Working with timber weatherboards
23 Nov 2013, Prove Your Know How, Technical
Timber weatherboards have an excellent performance history. By using a good product and following basic handling, installation and finishing procedures, builders should ensure a quality job.
Timber weatherboards are enjoying a resurgence in the wake of the country’s leaky building problems. The most commonly used timber weatherboard today is finger-jointed, treated and primed New Zealand pine.
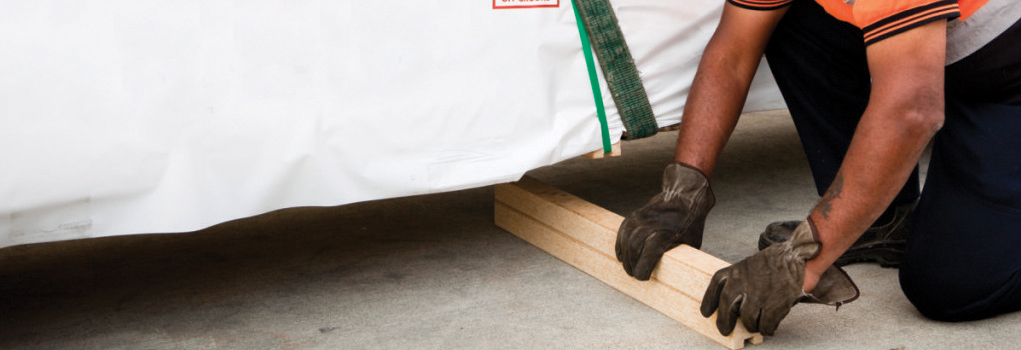
Packaged for weather protection
Check that timber weatherboards are well packaged – they should be well wrapped and strapped when leaving the manufacturer’s site. Wrapping should be a high-quality tear-resistant material, to provide adequate weather protection. Packets of weatherboards should have suitable bearers and strapping to withstand standard freight handling. Strapping should not bruise or mark the boards. The product should arrive at the site in perfect condition.
Get delivery ‘just in time’
Cladding should be delivered to site ‘just in time’. Boards that arrive on site too far ahead of schedule are at increased risk of damage through additional handling and moisture exposure.
If mechanical equipment is not available to unload boards, do it by hand. They should never be tipped from the truck. Once the material is unloaded, it should be inspected and major damage reported to the merchant immediately.
Store indoors and off the ground
Timber weatherboards are kiln-dried and the boards must be kept dry, as the priming does not weatherproof these products. Exposure to the elements increases the risk of board swelling, primer breakdown and tannin bleed. Boards should be stored indoors on a flat, well-ventilated surface, out of contact with the ground or concrete. Bearers should be placed evenly under the packet with a minimum of 150 mm clearance. A secondary cover and groundsheet should be used if boards are stored outdoors.
Key points for installation
Timber weatherboards may be specified in buildings that fall within the scope of NZS 3604 Timber-framed buildings and E2/AS1. Follow these specifications, as well as manufacturers’ individual weatherboard installation guidelines.
The following are some of the key points you should consider when installing the cladding:
Board set-out
- Ensure minimum lap requirements are met. Note the current version of E2/AS1 requires a 32mm minimum gap for timber weatherboard.
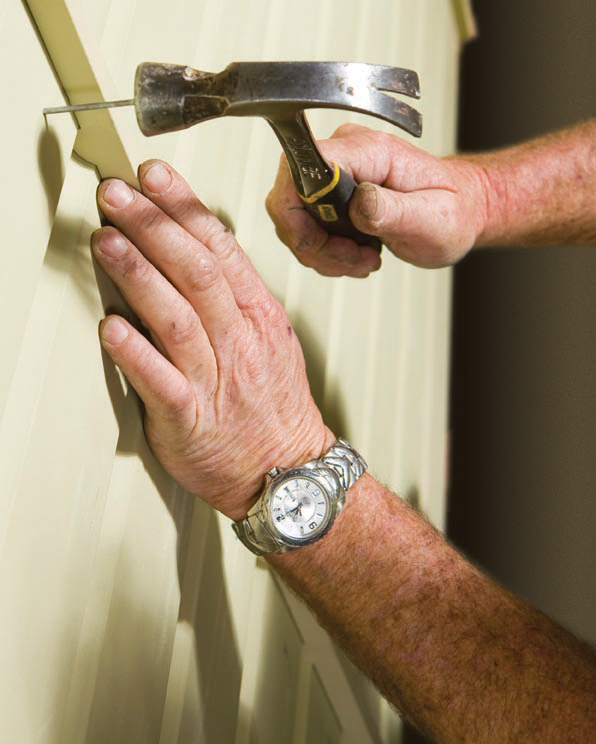
Fixing
- Correct fastening is essential. Use the appropriate nail – both size and nail head configuration are important.
- Hand nailing is recommended, as some gun fixings may bruise the surface of the board.
- Only one nail should be used per board at each stud spacing. Do not double nail boards, as this will impede the boards’ natural movement and may cause splitting. Do not nail through the lap of the weatherboard.
- Nails should be sloped slightly uphill to avoid water tracking along the length of the nail into the timber.
- Nails should be punched beneath the surface of the board and filled immediately, to avoid water penetration that will result in board swelling.
Ground clearances
- At ground level, weatherboards should finish at least 100 mm above paved surfaces and 175 mm above unpaved surfaces.
Cut ends
- Seal all cut ends/end grain immediately after cutting and before installation. For ease, use an aerosol end seal primer or two coats of premium oil-based timber primer.
Joints
- Weatherboards should be fixed in full wall lengths where possible. Some manufacturers provide 7.2 m lengths to minimise joints.
- Where a joint is necessary, it should be made over a stud or batten. Scarf the joint away from the prevailing wind at 45 degrees and use a single fixing through the overlapping board.
- Prime cut ends and cover joint with a soaker if required.
External corners
- Plain mitred external corners should be avoided.
- The use of corrosion-resistant soakers is preferable.
- When using boxed corners, use the appropriate scriber system.
- Scribers should be precoated to ensure weather protection.
- The use of a factory-cut preprimed scriber system is recommended for accuracy and ease of use.
Internal corners
- Corrosion-resistant flashings should be fitted behind the weatherboards at all internal corners.
Windows and doors
- Junctions at the interface between the cladding system and window and door openings, for example, are vital for weathertightness. Setting window head heights to suit the board module makes window flashing and cladding installation much easier.
- Ensure all flashings, weatherings and air seals are correctly in place.
- The BRANZ Good Practice Guide – Timber Cladding is a practical hands-on guide to installation.
Painting and finishing
Weatherboards should be painted and finished in accordance with AS/NZS 2311:2009 Guide to the painting of buildings. Manufacturers’ painting instructions should also be carefully followed.
Weatherboards should only be painted when dry and the board is near equilibrium moisture content (MC<16%). If you’re unsure, use a correctly calibrated moisture meter to measure board moisture content.
Board size dimensions should also be checked. If the board is larger than its factory-machined dimensions, it has probably taken on moisture. It must be allowed to dry out or shrinkage lap marks between the boards may occur, affecting overall aesthetics.
Preparation
- Remove all loose material from the board surface and ensure any unfilled nail holes are filled.
- Spot prime exposed, bare and damaged areas with premium oil-based timber primer.
- Lightly sand the surface where necessary to an even flat finish.
- If primer has been exposed to the weather for longer than six weeks, consult your weatherboard manufacturer for additional painting advice.
Other painting pointers
There are several other critical areas for painting:
- Cut ends – all cut ends should have been sealed with an oil alkyd primer sealer during installation.
- Priming – dual coat systems (pre-primed and undercoated) save painting time and labour, as well as offering better initial moisture protection. If weatherboards arenot dual coated, apply one full coat of primer as specified by the board manufacturer.
- Final coats – two top coats of premium low gloss acrylic should be applied at a minimum of 25 dry microns per coat. Total film build, including primers, should exceed 100 dry microns.
- Colour – dark colours absorb heat from the sun and increase the risk of board defects. For best performance, select colours in a range of 45% light reflective value (LRV) or greater.
Maintenance needed for longer life
A quality paint system should last in excess of ten years. Basic maintenance of a gentle annual wash of the exterior, especially under eaves and overhangs, will remove marine salts and other contaminants. When maintenance is required, use premium primer and undercoats followed by the original topcoat. Quality timber weatherboards, installed with care, and maintained effectively, should provide weathertight cladding for generations.
Register to earn LBP Points Sign in