Flashings – critical for weathertightness
12 Aug 2014, Featured, Prove Your Know How, Technical

Flashing junctions can be tricky, but it’s important to get them right. Here we review the steps for barge and ridge flashing intersections and termination of a raked apron flashing
Flashings are a critical component of the weathertightness of a building, whether protecting the head of a window or a roof cladding junction. It’s important flashings are folded accurately and assembled in the right order. Read the steps below to find out how to correctly install and assemble flashings.
Flashing basics
While metal flashings need to be aesthetically pleasing, to ensure they will be durable and watertight after installation, you must:
- Allow for thermal movement.
- Prevent damage to factory-applied coatings during installation.
- Correctly lap the flashing elements so that water cannot get into and/or be trapped within the joint.
- Avoid total reliance on sealants to weatherproof the junction.
- Ensure the finished joint is neat and precise with straight folds where required.
- Install the fixings through the flashing and into underlying framing.
- Meet cladding and bargeboard cover requirements – for buildings within the scope of E2/AS1, Table 7 gives the required flashing covers for the wind zone the building is erected in.
Assembling in the right order
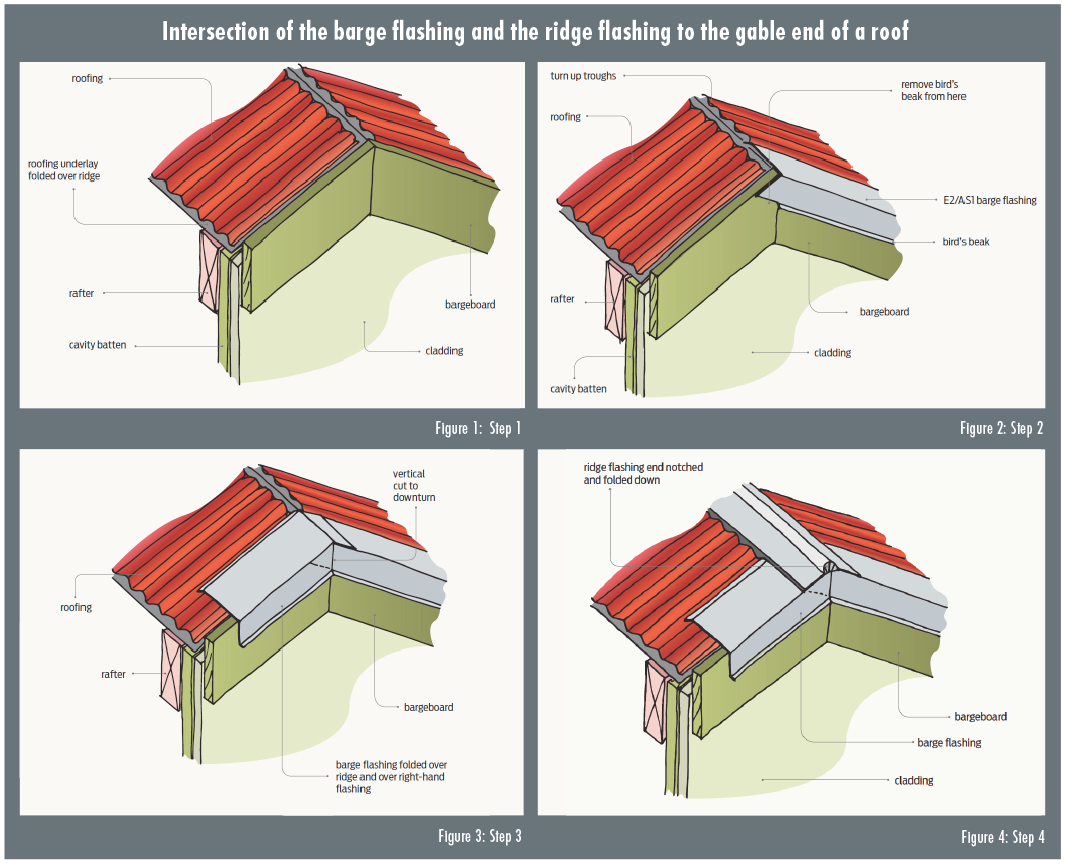
Two flashings junctions that need to be accurately folded and assembled in the right order are:
- The intersections of the barge flashing and the ridge flashing to the gable end of a roof (see Figures 1–4).
- The termination of a raked apron flashing that requires the forming of a stop-end by folding the flashing (see Figures 5–7) or by inserting a proprietary fabricated stop-end at the termination of the flashing.


Register to earn LBP Points Sign in