Installing plywood substrates for membrane roofs
12 Dec 2019, Learn, Prove Your Know How, Technical

The performance of a membrane roof is influenced by how well the substrate has been installed. The guidelines below outline how to install plywood substrates for a membrane roof
There are two potential pitfalls when it comes to installing plywood substrates.
- A substrate that isn’t constructed with enough fall might result in rainwater not draining away.
- If the membrane is applied over a wet substrate the membrane may not “stick”, bubbles may form.
Acceptable Solution E2/AS1 only covers butyl or EPDM membranes over plywood substrates with a minimum fall of 2°. BRANZ recommends a higher minimum fall of 3° to ensure better run-off, but builders should follow the fall specified in the consented plans.
The plywood should be specified by the designer. It will typically be H3 CCA-treated and kiln-dried CD grade structural ply of 17mm minimum thickness. LOSP-treated ply is usually not suitable.
Check the membrane manufacturer‘s technical literature for their particular plywood substrate requirements – there are subtle differences in construction requirements.
These are some common E2/AS1 and manufacturers’ requirements:
- Ensure that the roofing substructure is dry and has the required fall and that there will be a minimum 20mm gap between insulation and plywood.
- Install the ply with the smoothest (sanded) face upwards.
- Lay in a staggered joint pattern (brick bond) with the face grain of the top ply layer at right angles to the supporting framing.
- Ensure the ply is supported by framing at 400mm maximum centres and at all edges.
- Fix sheets with countersunk 10g x 50mm stainless steel screws at 150mm centres to the edges (100mm in very high /extra high wind zones) and 200mm centres within the sheet area. Some membrane manufacturers also require that the ply is glued down to framing.
- Check the membrane manufacturer’s technical literature for the width of joints. Liquid-applied membranes typically require 2mm to 3mm gaps between sheets, while sheet joints can be loose-butted with torch-on systems.
- Allow a perimeter expansion gap of 5mm where sheets are within a confined area (for example, surrounded by parapets).
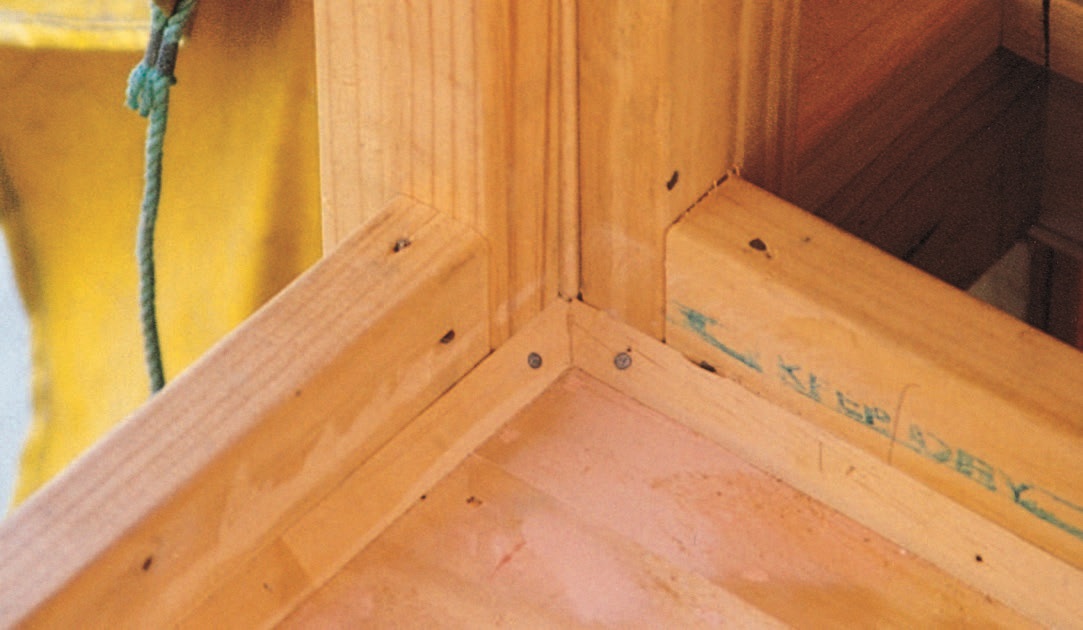
- Provide arrises of minimum 5mm radius (10mm is better) to all external edges.
- Chamfer or radius corners where the membrane is turned down into a gutter.
- Install 20mm H3.2 angle fillets to vertical upstands (except for some thermoplastic membranes).
- Fill/level holes or cracks.
- Sand the filler, joints and countersunk drill holes to remove splinters.
- Vacuum (or use a leaf blower) to remove surface dust and dirt.
- Keep the substrate dry – E2/AS1 requires that ply and substructure have a maximum moisture content reading of 20% at membrane installation (BRANZ recommends a maximum of 18%). Cover with tarpaulins at the end of each day and when rain is forecast.
For more information, see E2/AS1 or BRANZ Good Practice Guide Membrane Roofing (second edition, 2015).
Adapted from an article first published in BRANZ’s ‘Builder’s Mate’ issue 96 . Words supplied by BRANZ. www.branz.co.nz
Register to earn LBP Points Sign in
3 Comments
Leave a Reply
You must be logged in to post a comment.


good
Good
good