Retrofitting insulation
29 Jun 2016, Featured, Prove Your Know How
The state of the national housing stock is a hot-button issue; however, retrospectively installing insulation to create warm homes isn’t as simple as it seems
Changes to the Residential Tenancies Act mean that landlords across the country will soon have to add insulation to their rentals to ensure they are compliant with the rules.
Adding insulation helps keep houses warmer in winter and cooler in summer. It can also reduce the risk of condensation, meaning less mould and mildew, which creates a healthier environment for the occupants.
With MBIE recently proposing a ban on foil insulation during retrofits, it’s worth revisiting how to properly install insulation and what the alternatives are.
R-value
The R-value measures the resistance to the flow of heat through a given thickness of insulating material.
The higher the R-value, the better the insulation. To achieve its full R-value, insulation must be installed properly, with no gaps or compression points, and it must be kept dry.
The schedule method of NZS 4218:2009 Thermal insulation – Housing and small buildings, referenced in Acceptable Solutions and Verification Methods to Building Code clause H1 Energy efficiency, specifies minimum R-values for floors, walls and ceilings (see Table 1).
The alternative is to use the calculation or modelling methods identified. Houses built before the late 1970s are unlikely to have any wall insulation, although ceiling and floor insulation may have been retrofitted.
Insulation installed in houses built between 1979 and 2007 is likely to have a lower R-value than is currently required by the Building Code.
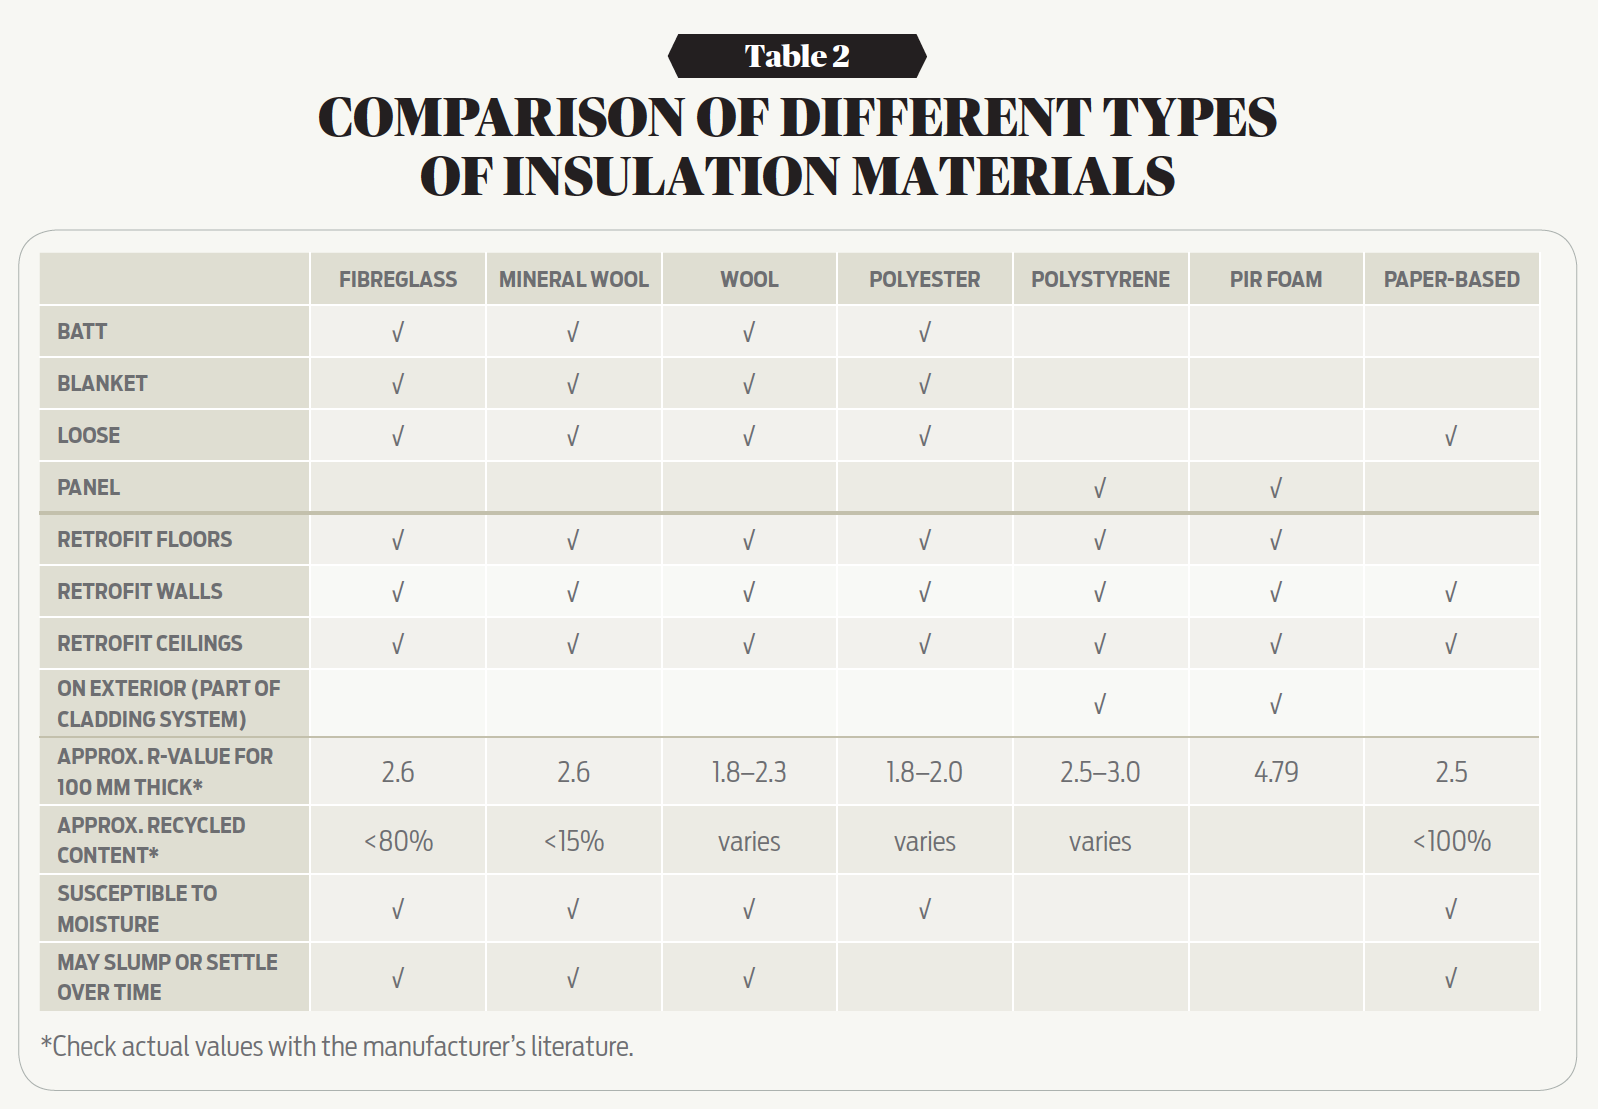

Several types of insulation
Bulk insulation
Bulk insulation uses small air pockets within the material to reduce or prevent heat flow.
Materials include fibreglass, mineral wool, polyester, wool, expanded foams such as polystyrene and polyisocyanurate (PIR) foam, and paper-based products. It’s available in a variety of formats – blankets, segments, biscuits, rigid sheets or loose fill (see Table 2).
Polystyrene should be separated from PVC electrical cables with waxed paper strips. However, electrical cables can safely be in contact with PIR foam.
Reflective insulation
Reflective insulation (also known as foil insulation) works by letting through only a small percentage of the radiant heat it receives and reflecting the rest.
A gap next to the reflective surface forms a layer of still air, which is important for reducing heat flow.
Reflective insulation is permitted for floors, but its use is not recommended by BRANZ. It can be easily damaged and loses its insulation properties once tarnished or dirty.
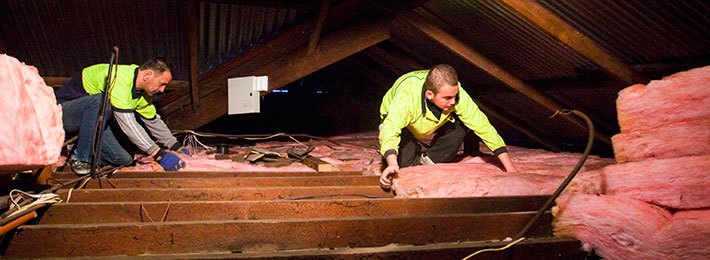
Start with roofs and ceilings
About 35% of heat loss from an average uninsulated home occurs through the ceiling and roof. In older, draughtier homes, this can be as much as 60%, so installing ceiling insulation is the most cost-effective place to start.
Where there is a roof space, the most effective way to insulate the ceiling is to install bulk insulation between the joists. A layer of blanket insulation over the top will eliminate thermal bridging – heat escaping through the timber joists.Access for installation may be difficult, especially at eaves and in low-pitched roofs.
Options with restricted roof space
Where roof space is restricted (low pitch) or non-existent (skillion roof), installing insulation is less straightforward, but there are still options:
Install from above by replacing the roofing. This also provides an opportunity to fit roofing underlay. The thickness of insulation is restricted by the rafter depth, as there must be a 25mm gap between the insulation and the underside of flexible roof underlay. The overall depth can be increased by installing deeper purlins.
Install from below by removing the ceiling lining – this is only suitable if metal roofing is installed over a roof underlay. A 25mm air gap must be maintained between the insulation and underlay (see Figure 1).
Install from below by going over the top of the existing ceiling lining with insulation and then overlaying this with a new ceiling lining.
The R-value achieved depends on the type and thickness of material used. There may be difficulties accommodating sufficient thickness into existing detailing or maintaining headroom.
Higher-performance insulants, such as some foams, may be used to increase thermal performance.
However, its use must meet the Building Code’s durability and protection from fire requirements.
For skillion roofs with exposed rafters, installing insulation between rafters is an option.
Points to remember
- Fit roofing underlay where it is absent in older houses. This allows any condensation that forms on the underside of the roofing to drain to the outside, rather than evaporating within the roof space.
- Maintain 25mm clearance between insulation and roofing underlay.
- Existing blown-in macerated paper may have settled and need to be topped up or replaced.
- In skillion roofs with an ‘air-leaky’ ceiling (for example, timber boarded), an air barrier must be installed over the ceiling to prevent air movement into the roof framing.
- Access is generally good but may be difficult in small roof spaces.
- Check clearances required around downlights and other fire hazards.
Floors
Up to 14% of heat loss occurs through the floor of an uninsulated house. Fit segments or panels of insulation between the joists. Remember:
- Panel or segment insulation is most effective.
- Fit snugly between the joists and as close to the underside of the flooring as possible.
- Access may be difficult.
- Install a vapour barrier, especially if ground clearance is limited.
- Existing foil insulation should be replaced with a bulk insulation.
- Take care to avoid electrical wiring and plumbing.
Walls
Up to 25% of the heat loss from an average uninsulated home is through the walls.
If linings or claddings are being replaced, it is relatively easy to install blanket or panel insulation into older houses, which were typically constructed with studs only and no dwangs.
However, these houses also had no building paper or underlay, relying on air movement in the wall cavity to allow evaporation of the moisture that inevitably made its way past the weatherboards.
If the insulation is susceptible to moisture, wall underlay will have to be retrofitted.
One way to do this is to fix continuous strips of underlay between the studs, creating a pocket and separating the insulation from the cladding (see Figure 2).
Installing wall underlay in houses with dwangs is done in the same way, but is more time consuming.
An alternative is to install rigid sheet insulation, fitted tight between the studs but not the full depth of the framing.
For match-lined walls, remove every second or third board and insert insulation as above.
Points to remember
- Consider wall insulation after insulating floors and ceilings or if you are replacing linings or claddings.
- Install bulk insulation with wall underlay folded into the framing cavity if none is present.
- Fit sheet insulation clear of the back of the cladding.
- For brick (double-skin or veneer), ensure the cavity is not compromised by insulation.
- A building consent is required to install insulation in exterior walls.
Get what you pay for
When comparing prices, consider the R-value you’re aiming to achieve, the thickness of insulation needed and the labour cost to install it.
In some situations, a more expensive product may be more economical overall.
Register to earn LBP Points Sign in