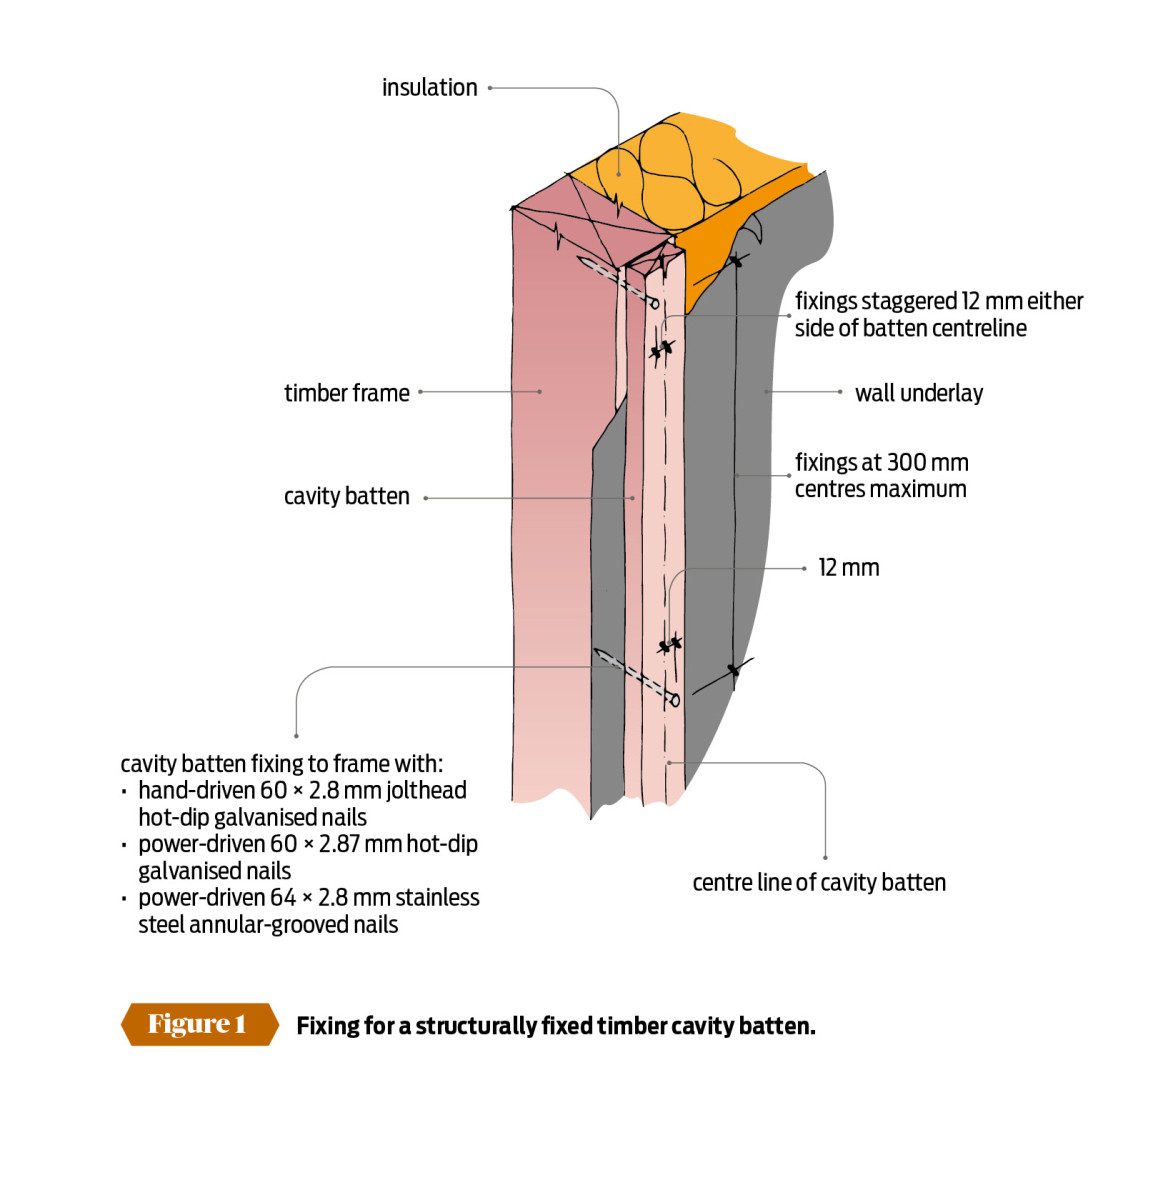
Structurally fixed cavity battens
27 Jul 2016, Featured, Prove Your Know How, Technical
The larger shank diameter of fixings used for weatherboards fitted over a cavity can cause splitting. One way to get around this problem is to fix timber cavity battens directly to the structural framing
Building code acceptable solution E2/AS1 clause 9.1.8.4(c) says that cavity battens must be fixed to the structural frame by the cladding fixing. Table 24 gives methods of fixing different claddings. The table includes fixing types and sizes, minimum frame penetrations for fixings and fixing patterns.
Minimum penetrations required
The minimum penetration length of fixings into the frame for particular claddings is the same whether the cladding is direct-fixed or over a cavity.
- Fixings for paint-finish weatherboards must have a minimum penetration of 35mm
into the structural frame. - Fixings for stained or bare finish weatherboards must have a minimum penetration of 30mm into the structural frame.
- When weatherboards are fixed over a cavity, fixings must be at least 20mm longer to achieve the minimum penetration into the structural frame.
As a general rule, as the nail length increases there is also an increase in shank diameter.
This can cause the weatherboards to split.
Solution – structurally fix cavity battens to framing
One way to overcome this potential splitting problem is to fix the timber cavity battens directly to the framing.
The battens then become part of the structural frame, which allows the fixings given in Table 24 to be used.
Although this is an alternative method, the structural integrity of this fixing arrangement was confirmed by BRANZ Test Report ST0589 Version 2 Fixing horizontal weatherboards to studs over a cavity. It is described in BRANZ Bulletin 582 Structurally fixed cavity battens.
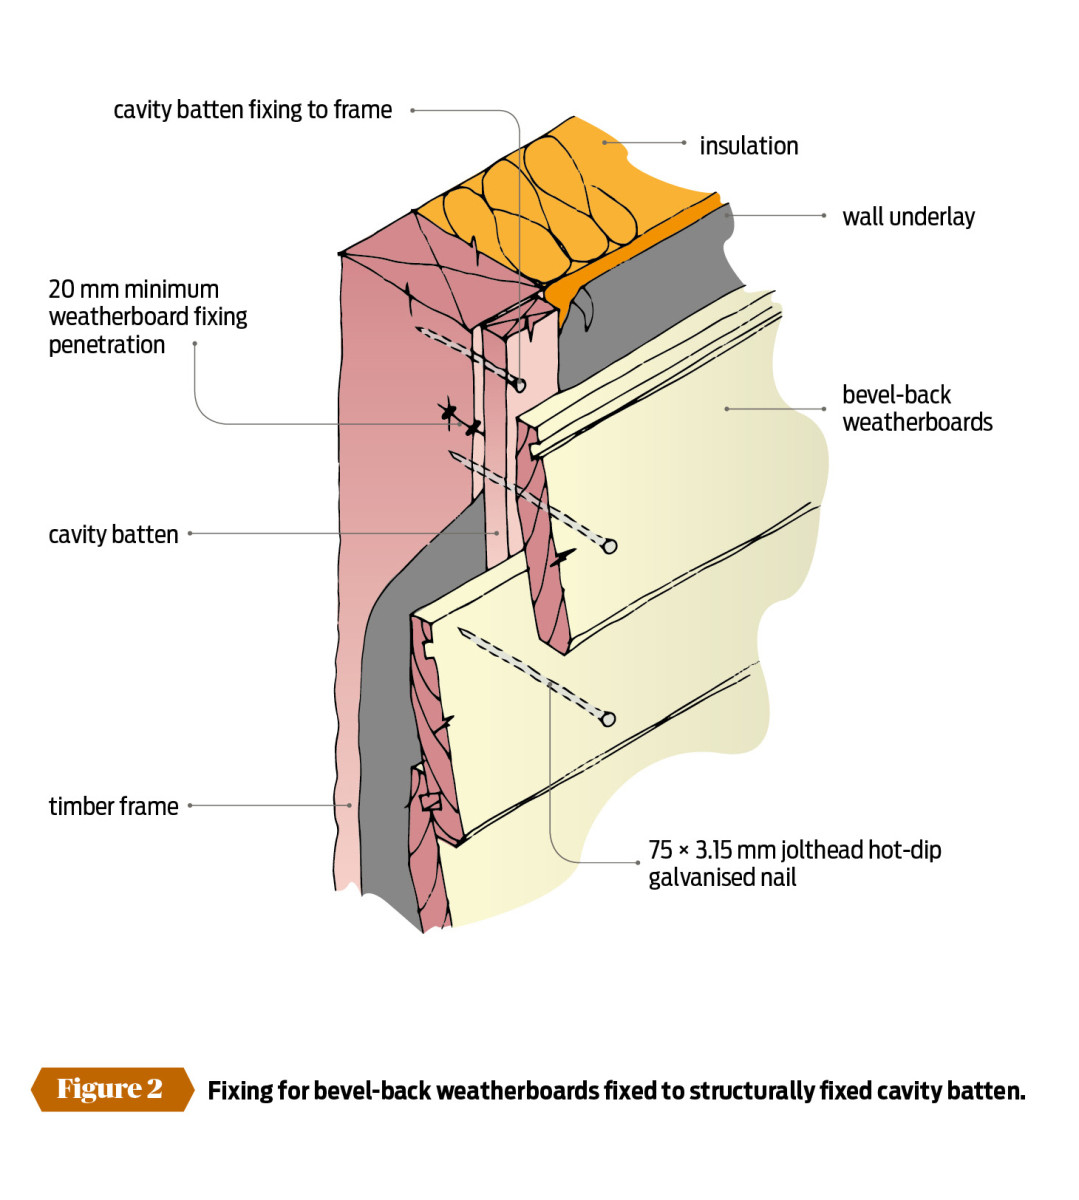
Rusticated and bevelback weatherboards
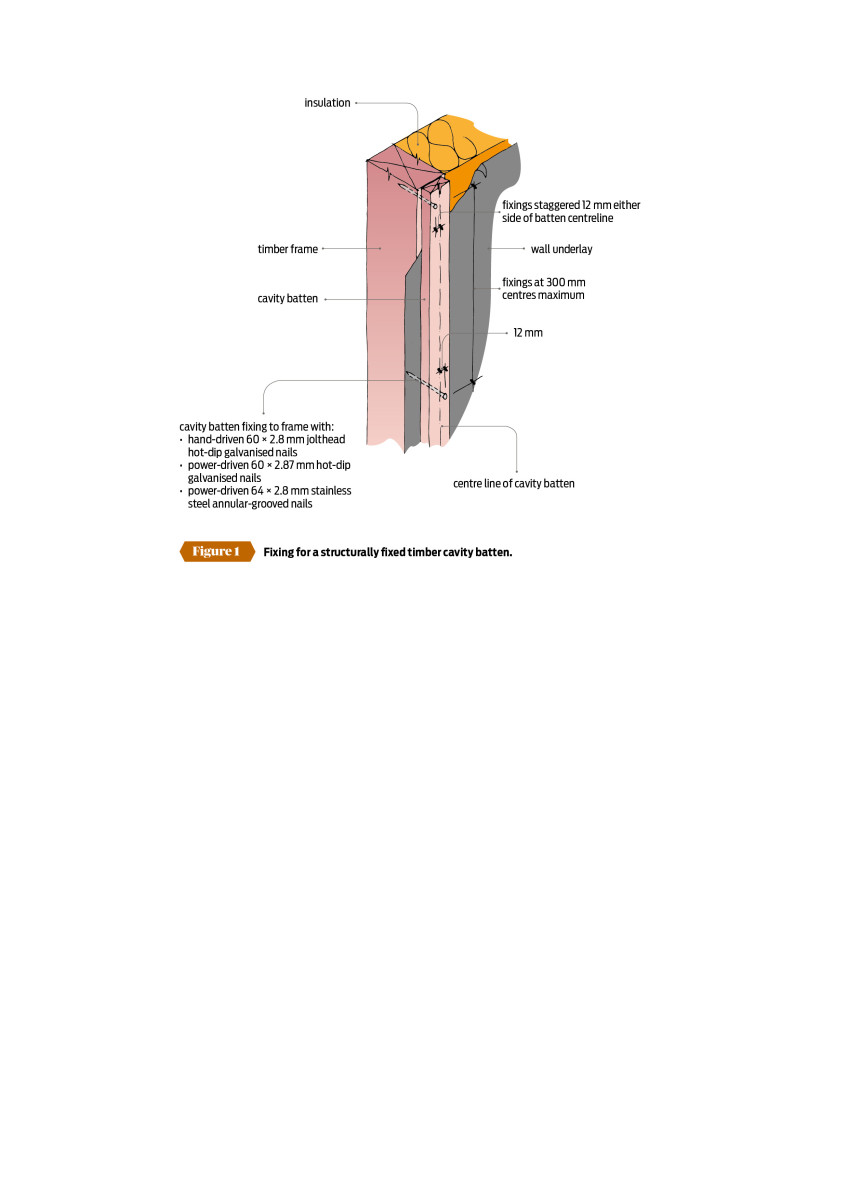
BRANZ Bulletin 582 states that, to fix horizontal rusticated and bevel-back weatherboards, timber battens must:
- Have a maximum thickness of 20mm.
- Be at least 40mm wide (E2/AS1 requires a minimum width of 45mm).
- Be treated to at least H3.1.
- Be kiln dried.
- Be located centrally over studs over the wall underlay.
Fixings must be:
- At 300mm centres vertically.
- Staggered 12mm on either side of the batten centreline (see Figure 1).
Making it a structural fixing
To achieve structural fixing of the timber battens, the fixings should be either:
- 60×2.8mm jolthead hot-dip galvanised nails, or
- 60×2.87mm power-driven hot-dip galvanised nails, or
- 64×2.8mm power-driven stainless steel annular-grooved nails.
The bulletin particularly recommends the use of 60×2.87mm power-driven hot-dip galvanised nails, as they have a D head, which provides greater holding power for the batten.
It also requires that cladding fixings must still be long enough to achieve a 20mm minimum penetration into the timber framing (see Figure 2). Use jolthead hot-dip galvanised nails:
- 75×3.15mm for bevel-back weatherboards.
- 75×3.15mm for rebated
bevel-back weatherboards. - 60×2.8mm for rusticated weatherboards.
Fixings for the weatherboards must be located centrally over the battens and studs.
Use with other claddings
Structurally fixed timber cavity battens may be used to extra high wind zones for other claddings.
- For claddings other than weatherboards, fix battens to studs at 300mm centres maximum with 75×3.15mm flathead hot-dip galvanised nails.
- Sheet claddings must be fixed to the battens at 300mm centres maximum, and fixings must have enough strength to resist the loads imposed in extra high wind zones.
Register to earn LBP Points Sign in
